Building a holiday snack board is my favorite way to bring a little chaos to the table. It’s honest, no-fuss, and a perfect excuse to raid the fridge and pantry for bits and bobs. Plus, it’s surprisingly satisfying to create a visual feast that everyone can dive into.
I love how each piece adds a different flavor or crunch, making every bite a discovery. Sometimes, I throw in a random jar of jam or a handful of popcorn just to keep it lively. It’s not about perfection; it’s about making something that feels personal and inviting.
Why Make This Again and Again
Because it’s endlessly customizable and turns simple ingredients into a communal celebration. I love how a few tweaks—adding fig jam or swapping in spicy salami—can totally change the vibe. It’s forgiving, spontaneous, and always feels like a little victory every time I build one.
What’s on the Board? A Breakdown
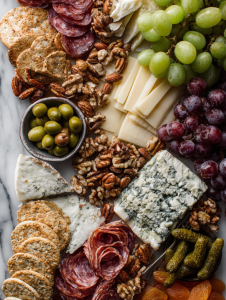
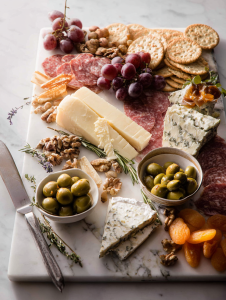
- Cheeses — I love a mix of creamy brie, sharp cheddar, and tangy blue.: They bring richness and variety, and are best at room temp for slicing.
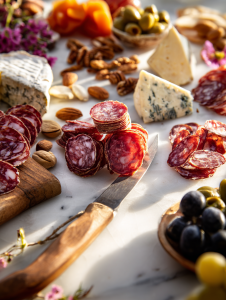
- Cured meats — Salami, prosciutto, and chorizo add smoky, salty bites.: Fold or roll for visual interest and easy pickings.
- Crackers and bread — Choose a variety for crunch and contrast.: Look for seeded or whole grain options for added flavor and texture.
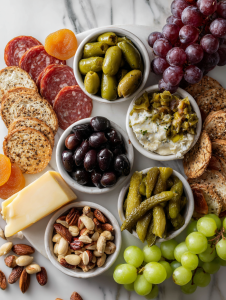
- Fruits and nuts — Dried apricots, fresh grapes, almonds, and walnuts.: They add sweetness, freshness, and crunch, balancing the savory elements.
- Extras — Olives, pickles, honey, or jam.: Small bursts of briny, sweet, or smoky flavors to keep things lively.
Tools That Make It Easier
- Large wooden platter or tray: Serves as the base for all your goodies.
- Cheese knives and small spoons: Helps serve cheeses and condiments without mess.
- Tongs or toothpicks: For easy picking and sharing.
- Small bowls or ramekins: Holds olives, nuts, or dips separately.
Crafting Your Holiday Snack Board: A Step-by-Step Journey
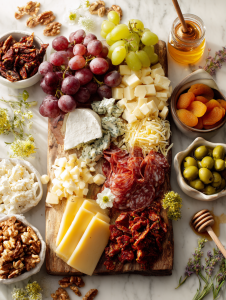
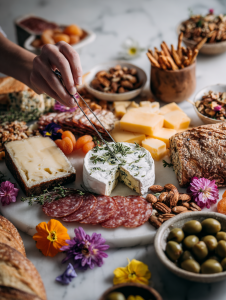
Step 1: Start with a clean, large wooden board or platter. It’s the canvas for your chaos.
Step 2: Arrange cheeses, cured meats, and crackers in clusters. Don’t overthink symmetry—embrace the irregular.
Step 3: Add fresh and dried fruits, nuts, and olives. Layer them for a colorful, inviting look.
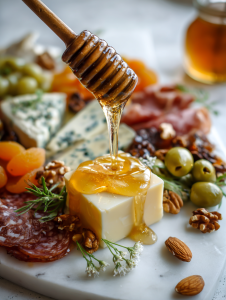
Step 4: Drizzle honey or balsamic glaze over cheeses for a glossy finish that catches the light.
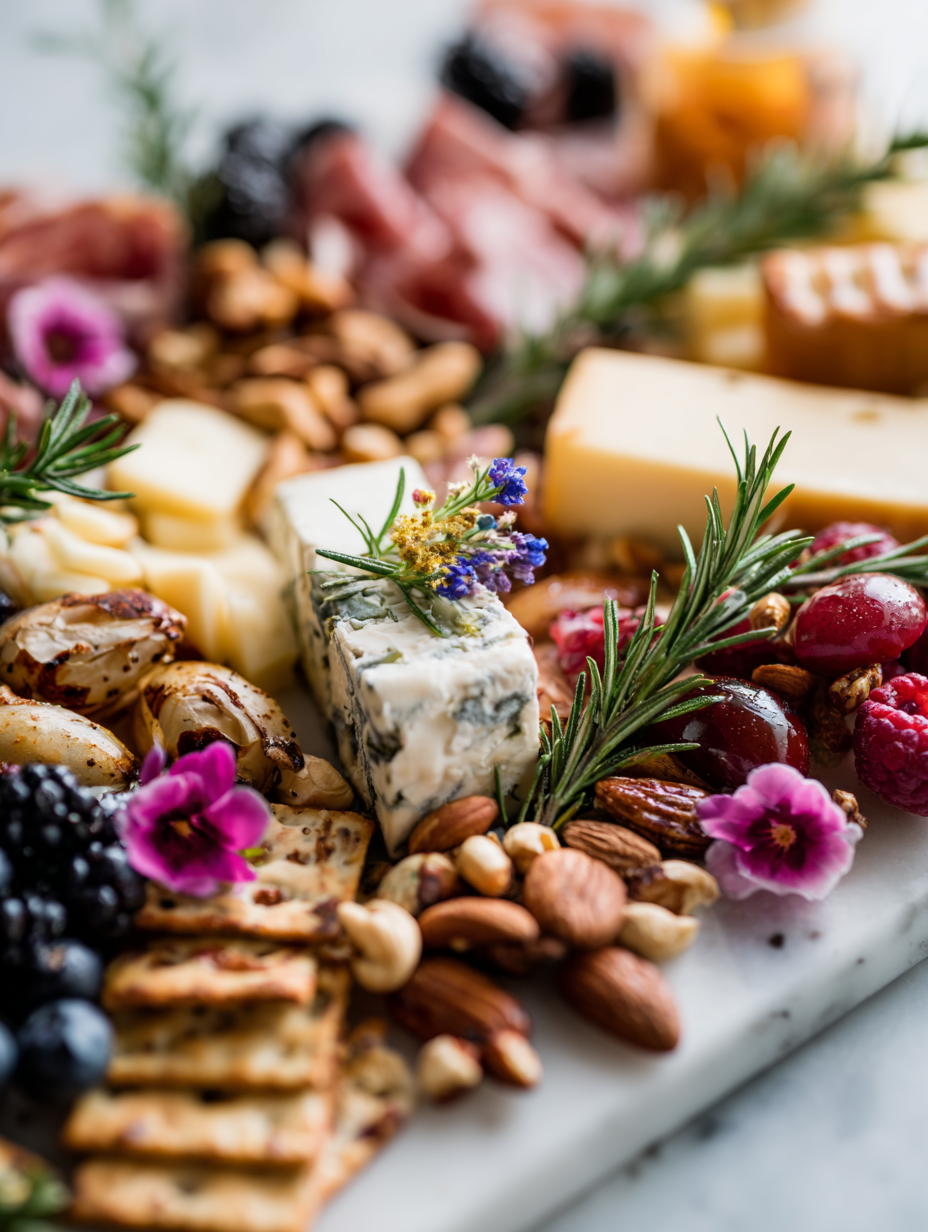
Step 5: Finish with herbs, edible flowers, or sprigs of fresh thyme for that ‘just-picked’ aroma.
Holiday Snack Board
Ingredients
Equipment
Method
- Place a large wooden platter or tray on your table to serve as the base for your snack board.

- Slice the cheeses into wedges or cubes and arrange them in small clusters across the platter, leaving space between for other ingredients.
- Fold or roll the cured meats and place them near the cheeses, creating small mounds or spirals for visual interest.
- Add a variety of crackers and bread slices around the cheeses and meats, filling in gaps for texture and crunch.
- Scatter dried apricots and fresh grapes in clusters on the board, layering them over the cheeses and meats for a burst of color and freshness.
- Sprinkle almonds and walnuts over the entire board, adding crunch and richness.
- Place small bowls or ramekins filled with olives and pickles around the board to contain briny bites.
- Drizzle honey or balsamic glaze over the cheeses to add a glossy finish and extra flavor.
- Finish by garnishing with fresh herbs or edible flowers for a festive, just-picked look.
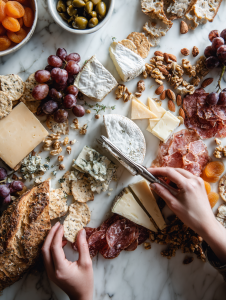
- Serve the snack board immediately, encouraging guests to pick and share from the colorful array of goodies.

Snack Board Success: Key Tips and Tricks
- Ensure cheeses are at room temperature for better flavor and easier slicing.
- Balance sweet, savory, and acidic elements for a vibrant, harmonious look.
- Use a damp cloth to clean your platter for a polished, fresh presentation.
- Adjust the amount of nuts and fruits based on your crowd’s preferences to avoid overload.
Avoid Common Pitfalls
- Overcrowding the board making it look busy and unappetizing.? TOO MUCH CLUTTER — Spread out ingredients more for visual appeal.
- Serving cold cheeses that are hard to cut and lack flavor.? NOT ROOM TEMPERATURE — Let cheeses sit out 30 minutes before serving.
- Uneven cheese and meat slices that look sloppy.? SLICES ARE UNEVEN — Use a sharp knife for clean cuts.
- A dull, monochrome display.? LACK OF COLOR — Add fresh herbs or edible flowers.
This board isn’t about perfection but personality. Each component tells a story, a little chaos of flavors and textures that invites sharing. It’s the kind of spread that sparks conversations and nostalgia, especially when everyone pitches in. No matter how you customize it, the real magic is in the messy, joyful assembly.

Hi, I’m Anjali Arora — the curious heart behind Feast Chase.
To be honest, I’ve always felt most at ease in my own company. I’m not exactly a people-person (small talk still makes me cringe), but there are two things I’ve always loved deeply: animals and food.