Pinwheels might seem simple, but their charm lies in the playful way they combine flavors and textures. I love how they turn a handful of common ingredients into something festive and fun, especially when you need to impress without stress. There’s a kind of joy in slicing through that perfect spiral and seeing all the colors and layers inside.
Why These Pinwheels Are a Regular in My Kitchen
They’re versatile, forgiving, and always look cheerful. No matter the occasion, I can swap fillings to match the season or mood. Plus, they’re quick to assemble and disappear fast—proof that simple flavors, when layered well, never go out of style.
Breaking Down the Ingredients
- Tortillas:: Soft, neutral base that holds everything together, adaptable with whole wheat or spinach versions.
- Cream cheese:: Rich and tangy, it keeps the fillings moist and helps everything stay in place.
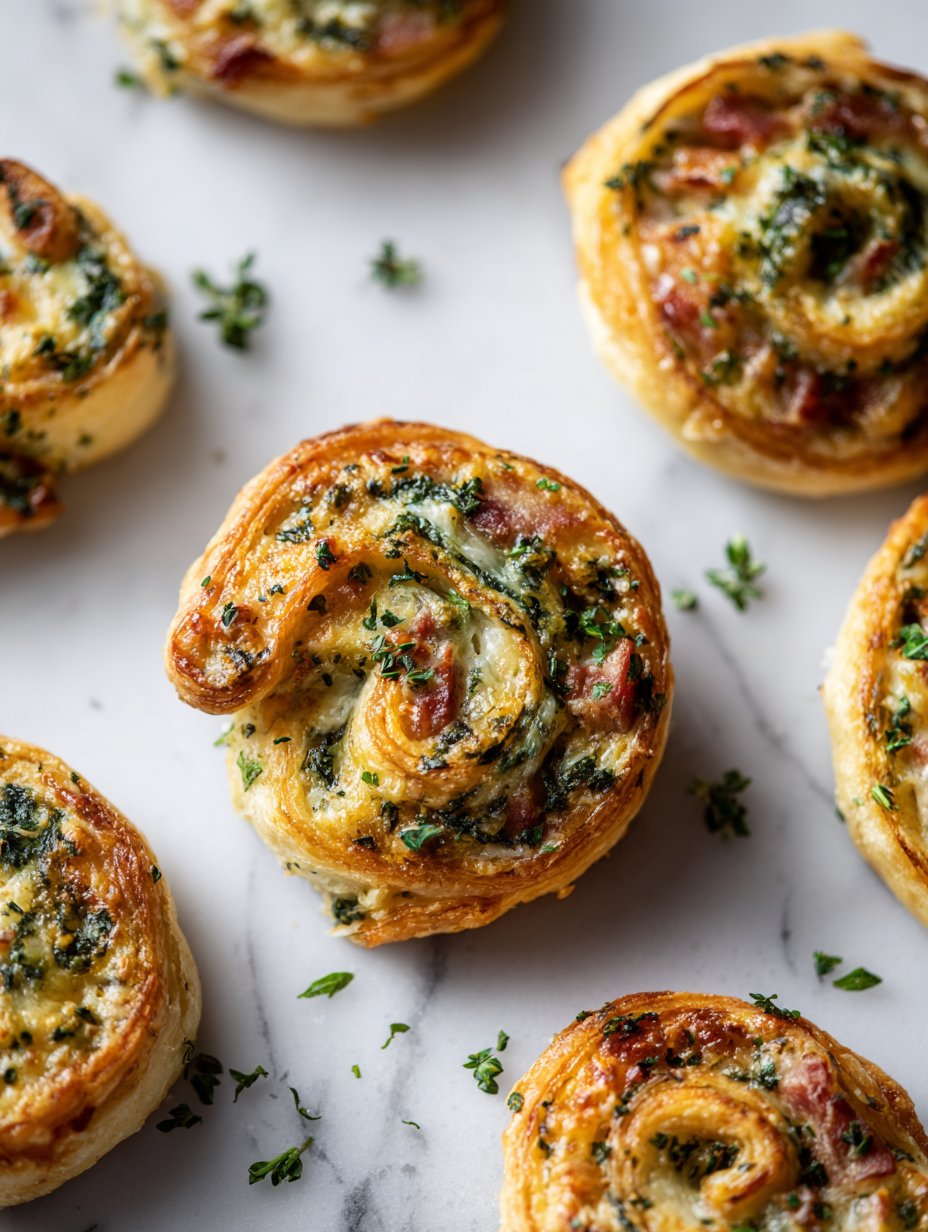
- Ham:: Salty, smoky slices that add depth and a savory punch.
- Spinach:: Fresh, slightly bitter greens that brighten the flavor and add color.
- Shredded cheese:: Melty, gooey cheese that turns golden and crispy in the oven.
- Optional extras:: Pickles, mustards, or hot sauce for a personalized kick.
Tools & Equipment for Perfect Pinwheels
- Large cutting board: A sturdy surface for assembly and slicing.
- Sharp chef’s knife: Cleanly slicing through the rolled tortillas.
- Baking sheet: Holding the pinwheels during baking.
- Parchment paper: Preventing sticking and easy cleanup.
- Spatula or tongs: Handling hot pinwheels without breaking them.
Crafting the Perfect Pinwheel: Step-by-Step Guide
Step 1: Preheat your oven to 180°C (350°F).
Step 2: Lay a large sheet of parchment paper on your work surface.
Step 3: Spread each tortilla with a thin layer of cream cheese, then layer with slices of ham, spinach, and a sprinkle of shredded cheese.
Step 4: Roll each tortilla tightly into a log, then slice into 1-inch pinwheels.
Step 5: Place the pinwheels on a baking sheet lined with parchment, cut side up.
Step 6: Bake for 12-15 minutes, until golden and crisp.
Step 7: Remove from oven and let cool slightly before serving.
Savory Pinwheels
Ingredients
Equipment
Method
- Preheat your oven to 180°C (350°F) and line a baking sheet with parchment paper.
- Lay a tortilla flat on your large cutting board and spread a thin layer of cream cheese over the surface, covering evenly.
- Layer slices of ham over the cream cheese, distributing them evenly to cover most of the tortilla.
- Sprinkle chopped spinach over the ham, adding a burst of fresh color and flavor.
- Sprinkle shredded cheese evenly across the top, ensuring good coverage for a cheesy finish.
- Carefully roll the tortilla tightly from one edge to the other, pressing gently to keep everything contained.
- Use a sharp chef’s knife to slice the rolled tortilla into 1-inch thick pinwheels, revealing the colorful spirals inside.
- Arrange the pinwheels cut side up on the prepared baking sheet, spacing them out evenly.
- Bake in the oven for 12-15 minutes, or until the pinwheels turn golden brown and crispy around the edges.
- Once baked, remove from the oven and let cool slightly on a wire rack or serving platter, allowing the cheesy layers to set.
- Serve warm or at room temperature, enjoying the crispy edges and savory, layered interior.
Cooking Checkpoints & Tips to Keep in Mind
- Ensure tortillas are evenly spread with cream cheese for smooth rolling.
- Watch the oven closely; pinwheels can burn quickly once golden.
- Slice pinwheels carefully to keep them intact and neat.
- Let the baked pinwheels cool slightly before serving to avoid burns and preserve texture.
Common Mistakes and How to Fix Them
- Squished or torn pinwheels when slicing.? Use a serrated knife for clean slices.
- Rolling too loose or uneven.? Chill the rolled tortillas for 10-15 minutes.
- Pinwheels not browning evenly.? Brush with egg wash before baking.
- Burned or undercooked edges.? Check oven temperature with a thermometer.
These pinwheels are a hit for a reason—they’re easy to make, endlessly customizable, and look pretty adorable on a platter. Whether you’re throwing together a quick snack or a festive appetizer, they bring a playful touch to any table. Feel free to experiment with different fillings to match your mood or seasonal ingredients. Just take a moment to enjoy the process and the smiles it brings.

Hi, I’m Anjali Arora — the curious heart behind Feast Chase.
To be honest, I’ve always felt most at ease in my own company. I’m not exactly a people-person (small talk still makes me cringe), but there are two things I’ve always loved deeply: animals and food.