Charcuterie boards have become the artful centerpiece of gatherings, but I’ve always loved the idea of turning that concept into a personalized, almost chaotic craft. This isn’t about perfect symmetry; it’s about storytelling with flavors and textures. It reminds me of lazy weekend afternoons, where the messiness of the board matches the relaxed vibe.
Why I Keep Coming Back to This Idea
Every time I build a board, it feels like a mini adventure. It’s a chance to get creative, to combine flavors I love, and to see how different textures play together. It’s imperfect, spontaneous, and always a little different. That unpredictability keeps me hooked—each board becomes a reflection of the moment.
What Goes Into a Charcuterie Board?
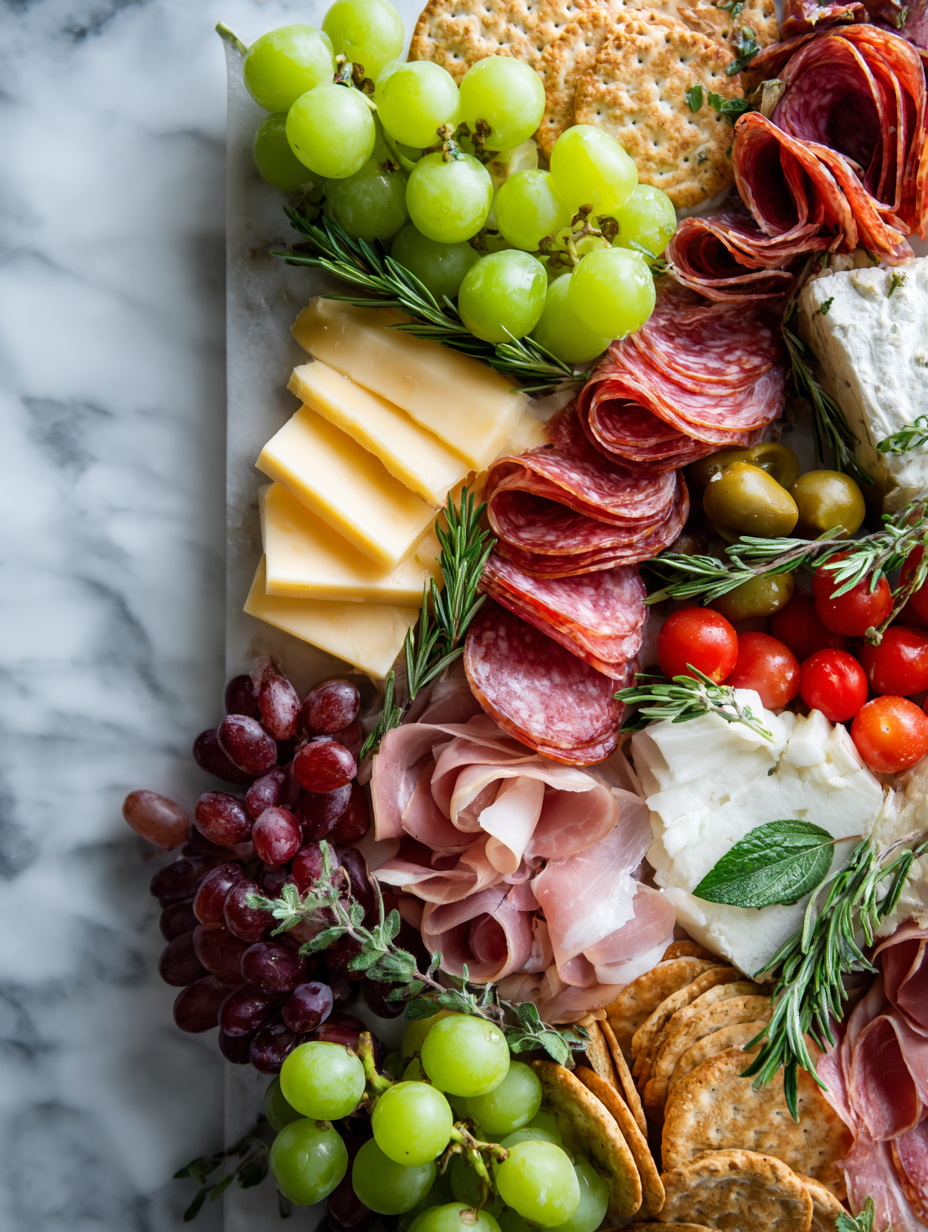
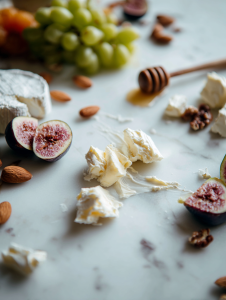
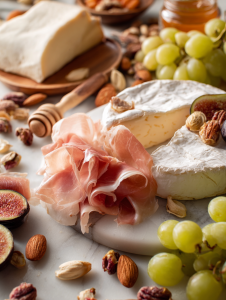
- Soft cheeses — Brie, Camembert: Creamy and mild, they melt in your mouth. Swap in blue cheese if you prefer a pungent kick.
- Cured meats — Salami, Prosciutto: Salty, fatty, and satisfying. For a leaner option, try turkey or chicken slices.
- Fresh fruits — Grapes, Figs, Apples: Juicy and sweet, they add brightness. Dried apricots or dates are equally good.
- Crunchy elements — Nuts, Crackers, Breadsticks: Add texture and contrast. Toasted almonds or pecans work well.
- Sweet accompaniments — Honey, Chutneys, Jams: Brighten the palate with contrasting sweet notes. Use fig jam or spicy mango chutney.
- Herbs & garnishes — Fresh thyme, Edible flowers: Visual appeal and subtle aroma. Use sparingly to avoid overpowering.
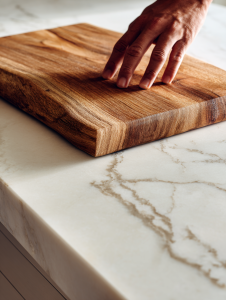
Tools and Equipment for a Memorable Charcuterie Board
- Large Wooden Board or Platter: Serves as the canvas for your creation.
- Cheese Knives: Facilitates slicing and serving cheeses.
- Tongs or Small Spatula: Helps place delicate items like figs or nuts.
- Small Bowls or Cups: Holds dips, honey, or chutneys.
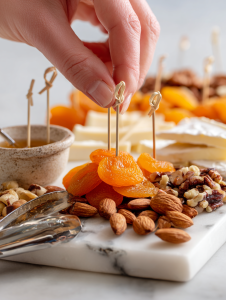
- Decorative Picks or Toothpicks: For picking up small, fragile items or garnishes.
Crafting a Charcuterie Board That Tells a Story
Step 1: Choose a large wooden board as your canvas—think rustic, not perfect.
Step 2: Start with a base of soft cheeses like brie and tangy goat cheese, spreading them unevenly for a natural look.
Step 3: Add slices of cured meats—salami, prosciutto—and fold them loosely to create height.
Step 4: Intersperse with colorful fruits—figs, grapes, dried apricots—for visual pop.
Step 5: Tuck in crunchy elements like toasted nuts or crispy breadsticks for texture.
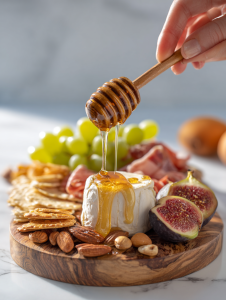
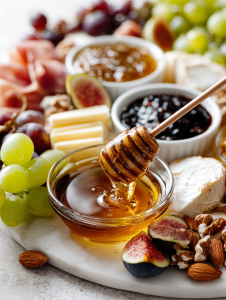
Step 6: Finish with dollops of honey, mustards, or chutneys—drizzle unevenly for a casual vibe.
Artful Charcuterie Board
Ingredients
Equipment
Method
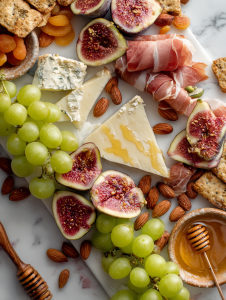
- Place your large wooden board on a clean surface as the base for your arrangement.

- Start by dolloping soft cheese like brie randomly across the board, spreading some unevenly for a natural effect.
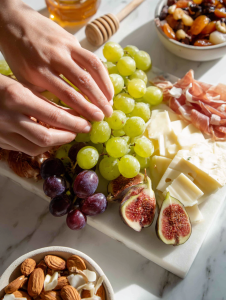
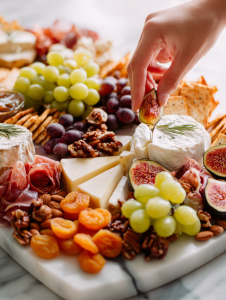
- Arrange slices of prosciutto loosely next to the cheese, folding and layering to create height and visual interest.
- Tuck clusters of grapes and halved figs into gaps around the cheeses and meats, adding pops of color and freshness.
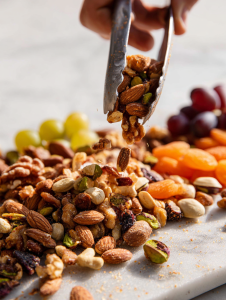
- Scatter toasted almonds and mixed nuts across the board, positioning them near the fruits to highlight their crunch.
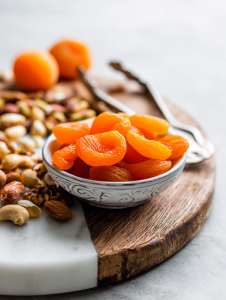
- Place dried apricots near the nuts for a sweet contrast that balances the savory elements.
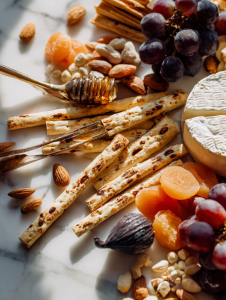
- Arrange crackers or breadsticks in a fan or scattered pattern around the board, making them accessible for serving.
- Drizzle honey over the cheese and fruits in uneven lines for a casual, inviting look.
- Use small bowls or cups to hold dips, chutneys, or additional honey, placing them strategically on the board.
- Add decorative picks or toothpicks to the small items for easy picking and a finished touch.
- Step back and review your board, adjusting items to ensure a balanced, colorful, and inviting presentation.
- Now, your artful charcuterie board is ready to serve—gather friends and enjoy the relaxed, flavorful feast!
Notes
Key Tips to Elevate Your Charcuterie Board
- Ensure cheeses are at room temperature for better aroma and flavor.
- Balance the flavors—salty, sweet, tangy, and smoky—for a dynamic tasting experience.
- Use fresh herbs or edible flowers as natural garnishes for color and aroma.
- Arrange items with variety in shapes and heights to keep the eye engaged.
- Keep the board accessible—don’t overcrowd, leave space for guests to add their own touches.
Common Pitfalls and How to Fix Them
- Cheeses are too cold, dull in flavor.? Forgot to bring cheeses to room temperature — Leave them out 30 minutes before serving.
- Cluttered look and overly sweet.? Dumped too much honey or chutney in one spot — Use a spoon to drizzle more evenly.
- Bitter, burnt nuts.? Over-torched nuts during toasting — Toss them in a lower heat, around 150°C (300°F), and watch closely.
- Overcrowding and difficulty accessing items.? Placed all items at once — Layer components gradually, starting with larger items.
Making a charcuterie board isn’t just about pairing cheeses and meats. It’s about creating a visual and flavor journey that sparks conversations and nostalgia. Don’t stress about perfection—embrace the chaos, and let your instincts guide you. The best boards are those that reflect your personality and surprise your guests.

Hi, I’m Anjali Arora — the curious heart behind Feast Chase.
To be honest, I’ve always felt most at ease in my own company. I’m not exactly a people-person (small talk still makes me cringe), but there are two things I’ve always loved deeply: animals and food.