When you drop that beef ball onto a hot cast iron, you hear a loud sizzle and the fat starts to pop. You press down with a spatula, forcing out moisture and encouraging that crust to form. It’s all about the sound and the immediate heat transfer, not just the shape of the patty.
You’re flipping and smashing, hearing that crackle, watching the edges turn dark and crispy. The mess of juices and bits sticking to the pan is part of the process, not a mistake—almost like a small battle in the kitchen.
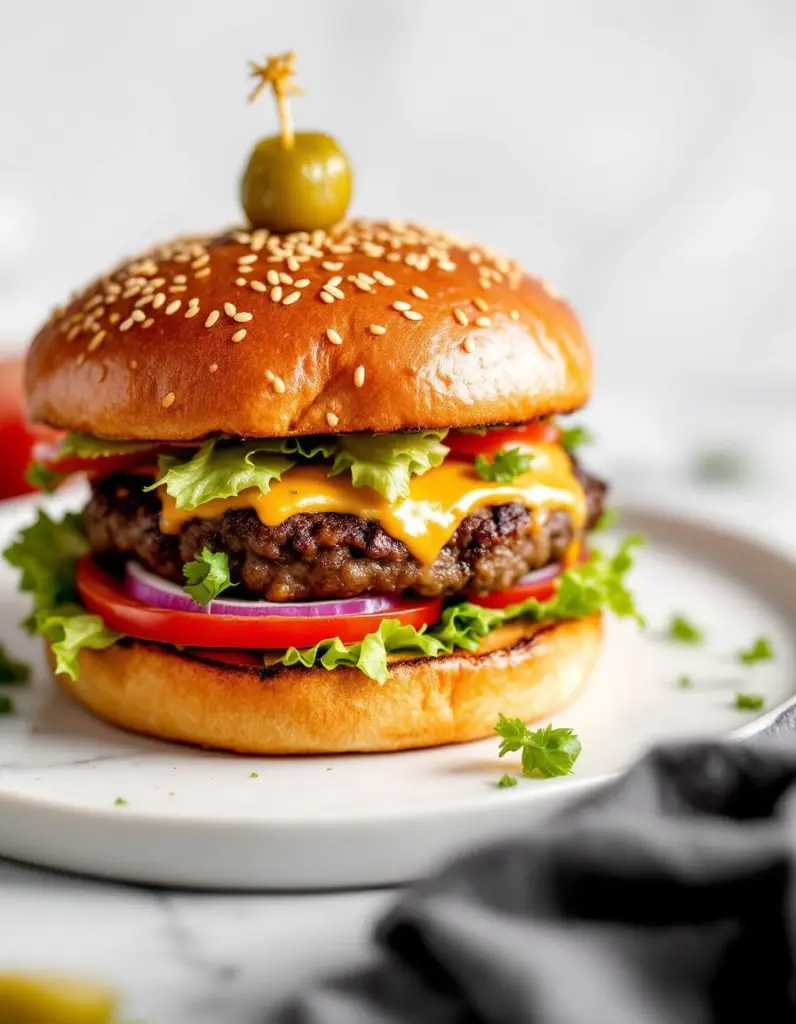
The satisfying sizzle and crackle as you press down on the beef patty, forcing out excess moisture and creating that perfect crispy crust.
Key Ingredients and Substitutions
- Ground beef: I stick with 80/20 here—juicy enough to crackle, but not so fatty that it splatters. You can swap in ground sirloin for leaner but watch out for dryness.
- Salt: I sprinkle liberally just before smashing—brings out that savory flavor and crust. Skip it if you’re reducing sodium, but don’t skip the seasoning altogether.
- Pepper: Freshly cracked, it adds a smoky bite that complements the beef. If you don’t love spice, tone it down or skip it for a milder burger.
- Cheese: American melts fast and stays gooey, perfect for that classic melt. Swap for cheddar if you want sharper notes, but it won’t get as oozy.
- Buns: Soft, toasted buns are key—they soak up juices without falling apart. Use brioche for richness or sturdy potato rolls if you want more chew.
- Pickles: Bright, vinegary crunch adds a sharp contrast. If you hate pickles, a quick dash of mustard or a slice of onion will do.
- Oil: A light brush of neutral oil helps prevent sticking and promotes crust. Skip if you’re using a non-stick pan, but then you might miss that crispy edge.

Crispy Smash Burger
Ingredients
Equipment
Method
- Divide the chilled ground beef into four equal loosely packed balls, handling them gently to maintain juiciness.
- Heat your cast iron skillet over medium-high heat until it’s hot and begins to smoke slightly, indicating it’s ready for the patties.
- Lightly brush the skillet with neutral oil to prevent sticking and help develop a crispy crust.
- Place a beef ball onto the hot skillet and immediately press down firmly with a sturdy spatula to flatten it into a thin patty, aiming for even thickness.
- Sprinkle salt and pepper evenly over the patty while it’s sizzling, enhancing flavor and crust formation.
- Cook for about 2-3 minutes until the edges are dark golden and crispy, then flip carefully with your spatula, hearing a satisfying crackle as the crust forms.
- Immediately place a slice of cheese on top of the flipped patty and cook for another minute until melted and gooey.
- While the cheese melts, toast the buns lightly in the same skillet or in a toaster, until golden and crisp.
- Remove the cooked patties and buns from the skillet, and assemble the burger by placing the cheesy patty on the bottom bun, then adding pickles and the top bun.
- Serve immediately, with a side of crispy edges and melted cheese, enjoying the combination of crunch and juicy beef with each bite.
Common Smash Burger Mistakes and Fixes
- FORGOT to flatten the patty evenly—use a sturdy spatula and press with consistent pressure.
- DUMPED too much oil in the pan—use a light coating, just enough to prevent sticking.
- OVER-TORCHED the edges—lower the heat if you see smoke or burning, and adjust quickly.
- MISSED the seasoning step—salt just before smashing boosts crust and flavor, don’t skip it.
Make-Ahead and Storage Tips
- Prep burger patties and keep refrigerated for up to 24 hours, so they’re ready to smash when you are.
- Toast buns and store in an airtight container for a day or two—fresher when you’re ready to eat.
- Slice pickles, cheese, and other toppings ahead—store separately to keep everything crisp and fresh.
- Reheat cooked patties in a hot skillet or oven, aiming for that crispy crust and warm interior, about 5 minutes.
- Flavors can intensify if kept too long; best enjoyed within a day or two for peak juiciness and crunch.
- Avoid freezing raw patties if you want that quick sizzle—freezing can dry out the meat and dull the crust formation.
FAQs
1. How do I get that crispy crust?
The beef should be cold and firm, not warm or greasy, to get that crispy crust. Feel the chill from the fridge before smashing.
2. What pan works best for smashing?
Use a hot cast iron or heavy skillet, hear the sizzle right away. The crackle means the crust is forming properly.
3. How hard should I press the patty?
Don’t press too hard at first; just enough to flatten. Too much pressure pushes out all the juices and leaves a dry burger.
4. How do I get the cheese to melt perfectly?
If the cheese isn’t melting fast enough, cover the pan briefly or lower the heat. The oozy gooeyness is what you’re aiming for.
5. How should I reheat leftovers to keep them crispy?
Reheat in a hot skillet or oven until crispy and warmed through—about 5 minutes. Feel the heat and listen for a slight crackle when it’s ready.

Hi, I’m Anjali Arora — the curious heart behind Feast Chase.
To be honest, I’ve always felt most at ease in my own company. I’m not exactly a people-person (small talk still makes me cringe), but there are two things I’ve always loved deeply: animals and food.