Making cherry pie means dealing with sticky juice that drips down your wrists and pools on the counter. The tart-sweet filling bubbles and splatters as it cooks, so you need a sturdy surface and a towel close by.
Getting the crust just right involves a flurry of flour, cold butter, and quick hands, trying not to warm the dough too much. You’ll feel it come together under your fingertips, slightly crumbly but holding when pressed.
The way the cherry filling bubbles and pops as it heats, releasing a sweet, smoky aroma that fills the kitchen.
Key ingredients and swaps
- Fresh cherries: I pick out the plumpest, darkest ones—smelling like a sweet, smoky jam. If fresh aren’t in season, frozen works, just let them thaw and drain well to avoid soggy crust.
- Sugar: I use plain granulated for the filling—too much turns it cloying, so measure carefully. Swap for honey or maple syrup if you want a deeper, caramel-tinged sweetness, but cut back on liquid otherwise.
- Lemon juice: Brightens the tartness and cuts through the richness of the crust. Skip or reduce if you don’t have fresh lemons, but it’s the zing that makes the filling sing.
- Cornstarch: Thickens the juice into a glossy, oozing filling. Arrowroot is a good substitute if you want a clearer, more delicate gel—just use the same amount.
- Pie crust: I prefer a flaky butter crust, but a cold, sturdy shortening crust can work if you want a more tender bite. Either way, keep everything cold and handle the dough lightly to avoid toughness.
- Butter (for crust): Adds richness and a subtle nutty aroma. You can swap in margarine or a plant-based spread, but it won’t quite have that melt-in-your-mouth quality.
- Egg wash: Brushed over the crust for a golden finish—mix a beaten egg with a splash of water. Skipping it won’t ruin the pie but it won’t have that shiny, bakery look.

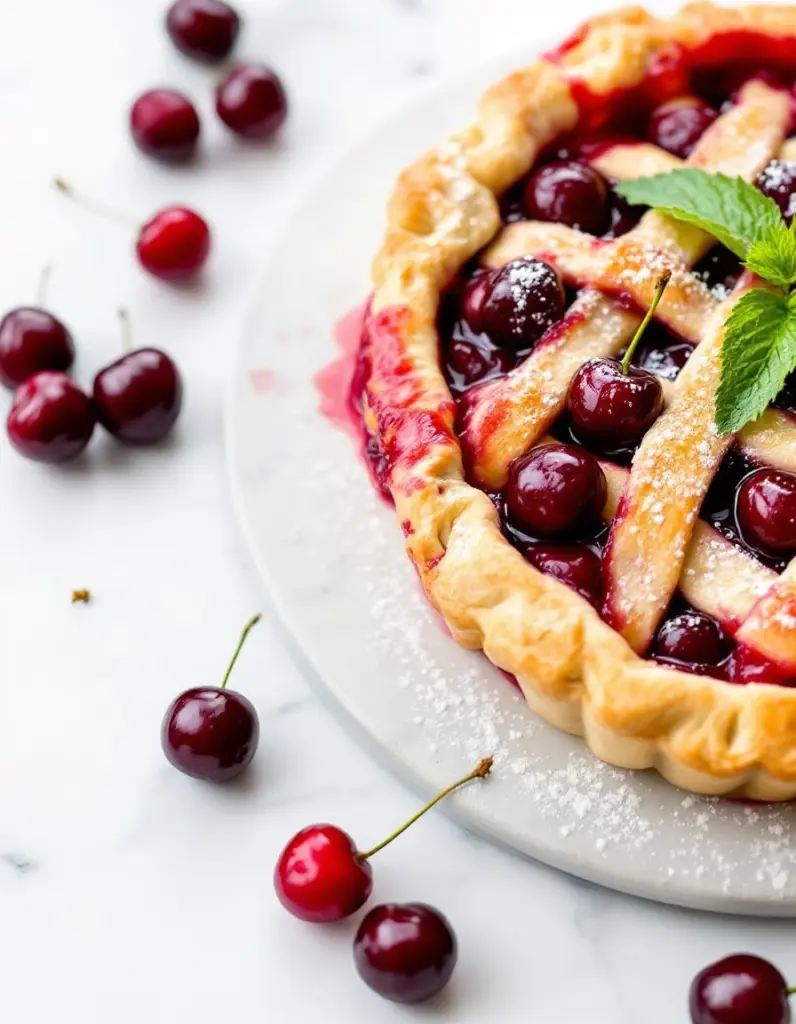
Homemade Cherry Pie
Ingredients
Equipment
Method
- Start by preparing your cherry filling: in a large bowl, gently toss the pitted cherries with sugar, cornstarch, and lemon juice until evenly coated. Set aside to let the mixture release some juices.
- Next, roll out one chilled pie crust on a lightly floured surface to fit your pie dish, about 1/8 inch thick. Carefully transfer it into the dish, pressing gently to fit the bottom and sides.
- Pour the prepared cherry filling into the crust, spreading it evenly with a spoon. Be sure not to overfill to prevent spilling during baking.
- Roll out the second pie crust to the same thickness and place it over the filling. Trim excess dough and crimp the edges to seal the pie. Cut a few small slits in the top crust to allow steam to escape.
- Mix the beaten egg with a tablespoon of water to create an egg wash. Brush this over the top crust for a golden, shiny finish.
- Bake the pie in a preheated oven at 375°F (190°C) for about 45 minutes, or until the crust is deep golden brown and the filling is bubbling thickly through the slits.
- Once baked, remove the pie from the oven and let it cool on a wire rack for at least 2 hours. This helps the filling set and makes slicing easier.
- Slice and serve your homemade cherry pie with a scoop of vanilla ice cream or a dollop of whipped cream. Enjoy the warm, fragrant, and bubbling dessert!
Common Cherry Pie Mistakes and Fixes
- FORGOT to chill the crust—warm dough becomes tough, fix by refrigerating 30 minutes.
- DUMPED too much sugar—causes syrupy filling, reduce or balance with lemon juice or zest.
- OVER-TORCHED the crust—edges burn before filling sets, shield with foil or use lower oven temp.
- FORGOT to drain excess juice—makes crust soggy, let cherries sit in a colander before filling.
Make-Ahead and Storage Tips
- Cherry filling can be made a day ahead; keep refrigerated for up to 24 hours, just give it a stir before filling the crust.
- Unbaked pie can be assembled a few hours before baking; wrap tightly and refrigerate for up to 4 hours, or freeze for longer storage.
- Freezing the assembled pie for up to 2 months works well; thaw in the fridge overnight before baking to prevent sogginess.
- Flavor intensifies as it sits—cherry juices meld, so don’t worry if it tastes a bit sharper before baking.
- Reheat slices in a 350°F oven, checking every 10 minutes until the crust is crisp and filling is bubbling hot—not just warm.
FAQs
1. How do I prevent the filling from overflowing?
Cherry pie filling can be tangy and oozy, especially when hot, so be careful not to spill it when serving. The tartness hits your tongue first, followed by a sweet, smoky aroma from the bubbling cherries.
2. Can I use frozen cherries?
Use ripe, firm cherries for a burst of juicy sweetness and vibrant color. If fresh aren’t available, frozen cherries work—they’ll be slightly softer but still flavorful, just drain excess juice to avoid soggy crust.
3. How do I keep the crust flaky?
To get a flaky crust, keep everything cold—dough, butter, even your hands—and handle it as little as possible. A light, crisp edge paired with a sticky, fragrant filling is what you’re aiming for.
4. How do I know when the pie is done?
Bake the pie until the crust is deep golden and the filling is bubbling thick and shiny. The aroma of caramelized cherries and butter should fill your kitchen, signaling it’s just right.
5. Best way to reheat leftover pie?
Serve the pie slightly warm or at room temperature. The filling will thicken as it cools, and the crackly crust will give with a gentle press, releasing that sweet, smoky cherry scent.

Hi, I’m Anjali Arora — the curious heart behind Feast Chase.
To be honest, I’ve always felt most at ease in my own company. I’m not exactly a people-person (small talk still makes me cringe), but there are two things I’ve always loved deeply: animals and food.