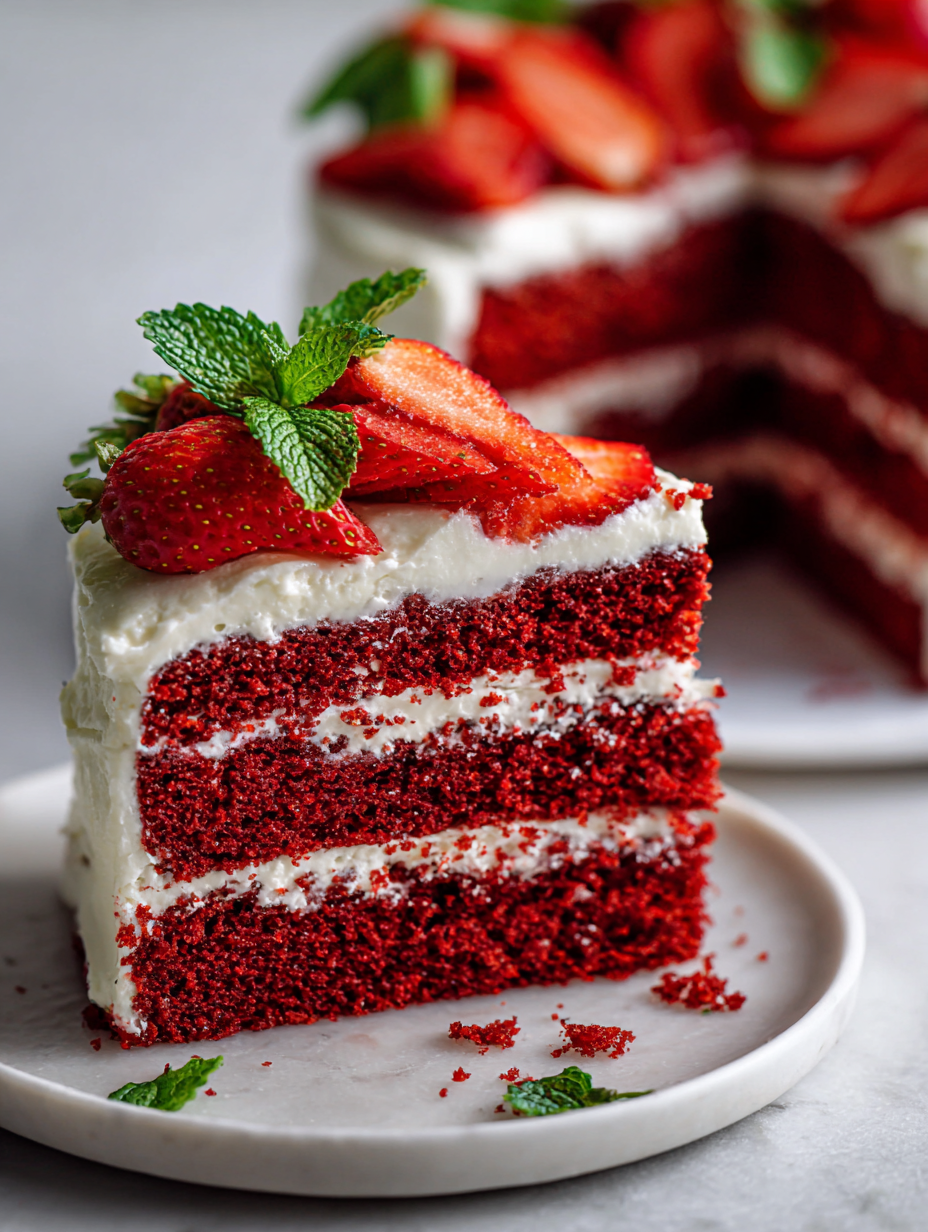
This cake is my summer in the middle of winter, a burst of sunshine with every slice. The deep red velvet crumb paired with bright, juicy strawberries feels like a celebration of color and flavor that can brighten even the gloomiest days.
I love how the vibrant red makes the cake look almost too pretty to cut, but then you taste the tender crumb and those fresh strawberries and realize it’s about comfort and joy. It’s not just a dessert; it’s a way to bring a little sunshine to the table, no matter the season.
Baking this feels like a small act of rebellion against the cold, a reminder that flavors and colors can lift spirits and spark nostalgia. It’s a cake that celebrates the playful, vibrant side of baking, with a simple trick to make it taste like summer in every bite.
Focusing on how the vibrant red of the velvet cake and the bright, juicy strawberries create a visual and flavor harmony that feels like summer on a plate, even in the depths of winter.
The inspiration behind this cake
- This cake is a nod to childhood summers and the simple joy of strawberries. I wanted to create a dessert that captures that fleeting moment when strawberries are at their peak—bright, juicy, almost fragrant enough to eat on their own. The red velvet base seemed like the perfect canvas to showcase those strawberries in a way that feels both nostalgic and fresh.
- One summer, I stumbled upon a basket of wild strawberries at a farmers’ market. Their deep scent and slightly tart punch made me rethink how I’d been using fruit in desserts. Combining them with the velvety, cocoa-rich cake felt like a natural evolution—something that balances richness with that burst of fruit brightness, like a little slice of summer all year round.
- story_type
Ingredient breakdown: key components
- Cream cheese: I like it at room temp—smooth and easy to fold into batter, adding a slight tang. Swap Greek yogurt if you want lighter, but you’ll lose some richness.
- Strawberries: Juicy, fragrant berries make or break this cake. Use ripe, bright red strawberries; the flavor really shines through. Frozen works in a pinch, just thaw and drain excess water.
- Red food dye: I prefer gel dye for vibrant color without thinning the batter. If you skip it, the cake’s hue dulls, but the flavor stays pure cocoa and vanilla.
- Cocoa powder: I use unsweetened Dutch-processed—deepens the color and flavor. Dutch-processed helps the cake rise evenly without bitterness; natural cocoa can give a sharper tang.
- Buttermilk: Adds moisture and a tender crumb. If out, sour milk works; just add a splash of lemon juice to regular milk and let it sit for 5 minutes. You want a tangy, lacy crumb.
- Sugar: Fine granulated for smooth batter, but try superfine if you want a softer crumb. Too coarse, and the cake feels gritty; too fine, it’s extra tender.
- Eggs: Large, farm-fresh eggs give better structure and richness. If you need vegan, try aquafaba, but flavor and texture will shift slightly.
Spotlight on key ingredients
Strawberries:
- I love using ripe, fragrant berries—they ooze sweet juice and add a fresh punch that brightens every bite.
- Fresh strawberries: Their juicy, fragrant nature makes or breaks this cake. Use ripe, bright red berries for maximum flavor and color.
Cream cheese:
- I prefer it softened at room temperature—smooth, tangy, and easy to fold into frosting, giving it that luscious texture.
- Its slight tang and creamy consistency give the frosting a rich, balanced flavor that complements the strawberries perfectly.
Ingredient swap ideas
- Dairy-Free: Swap cream cheese with dairy-free cream cheese or coconut cream for a similar tang and creamy texture, though expect a slightly different flavor profile.
- Sugar Alternatives: Use honey or maple syrup in place of granulated sugar. Adjust liquid content slightly to compensate, as sweetness and moisture levels vary.
- Gluten-Free: Replace all-purpose flour with a gluten-free baking blend. The texture may be a bit denser but still delicious.
- Vegan: Replace eggs with flaxseed or chia seed gel, and use plant-based butter or coconut oil in frosting. The flavor stays rich, but the crumb might be a touch more delicate.
- Strawberries: Use frozen strawberries if fresh are unavailable; just thaw and drain excess water. The flavor remains bright, but the texture may be softer.
- Red Food Dye: Natural options like beet juice can add color, but the hue will be less vibrant and may slightly alter the flavor.
- Cocoa Powder: Dutch-processed cocoa gives a smooth, rich chocolate flavor; natural cocoa will add a sharper, more acidic note.
Equipment & Tools
- Oven: Bake the cake layers evenly
- Mixing bowls: Combine and mix ingredients
- Sieve: Aerate dry ingredients and remove lumps
- Electric mixer: Cream frosting and mix wet ingredients
- Cake pans: Shape the cake layers
- Wire racks: Cool the cakes evenly
- Spatula: Spread frosting smoothly
- Toothpick: Test cake doneness
Step-by-step guide to Red Velvet Strawberry Cake
- Preheat your oven to 180°C (350°F). Grease two 20cm (8-inch) round cake pans and line the bottoms with parchment paper.
- In a large bowl, sift together 2 1/2 cups (310g) all-purpose flour, 1/4 cup (25g) unsweetened cocoa powder, 1 teaspoon baking soda, and a pinch of salt. Set aside.
- In another bowl, whisk 1 cup (200g) sugar, 1/2 cup (120ml) vegetable oil, 2 large eggs, and 1 teaspoon vanilla extract until well combined and slightly frothy, about 2 minutes.
- Add 1 cup (240ml) buttermilk to the wet ingredients, mixing until smooth. Then, stir in 2 teaspoons bright red gel food dye for a vibrant hue.
- Gradually fold the dry ingredients into the wet mixture, just until batter is smooth. Do not overmix; a few lumps are fine.
- Divide batter evenly between the prepared pans. Tap gently on the counter to release air bubbles.
- Bake for 25-30 minutes, or until the tops are set and a toothpick inserted in the center comes out clean. The sides may slightly pull away from the pan.
- Let the cakes cool in pans for 10 minutes, then turn out onto wire racks. Cool completely before frosting.
- While the cakes cool, hull and quarter 1 pound (450g) of ripe strawberries. In a bowl, gently mash some of the strawberries, leaving others chunky for texture.
- Prepare a cream cheese frosting by beating 8 oz (225g) softened cream cheese with 1/2 cup (115g) unsalted butter, and gradually add 2 cups (250g) powdered sugar until fluffy and smooth.
- Spread a layer of frosting on one cake layer, then scatter some fresh strawberries over it. Top with the second cake layer and finish frosting the sides and top.
- Decorate with remaining strawberries and a light dusting of cocoa powder if desired. Let the cake set for at least 30 minutes before slicing.
Allow the assembled cake to rest in the fridge for at least 30 minutes to set the frosting. Serve chilled or at room temperature, slicing with a sharp, clean knife for neat pieces.
How to Know It’s Done
- Cake edges are golden and firm, with a slight crackle when tapped.
- Toothpick inserted in the center comes out clean with moist crumbs, not wet batter.
- Strawberries are oozing juice but not soggy, and frosting is creamy and holds shape.
Red Velvet Strawberry Cake
Ingredients
Equipment
Method
- Preheat your oven to 180°C (350°F). Grease two 20cm (8-inch) round cake pans and line the bottoms with parchment paper.
- Sift together the flour, cocoa powder, baking soda, and salt into a large mixing bowl. Set aside to aerate.
- In a separate bowl, whisk together the sugar, vegetable oil, eggs, and vanilla extract until the mixture becomes slightly frothy and fragrant, about 2 minutes.
- Add the buttermilk to the wet mixture and stir until smooth. Then, incorporate the bright red gel food dye to achieve a vivid red hue.
- Gradually fold the dry ingredients into the wet mixture using a spatula or mixer on low speed, just until combined and smooth. Do not overmix.
- Divide the batter evenly between the prepared pans and tap them gently on the counter to remove air bubbles.
- Bake in the oven for 25-30 minutes, or until the edges are set and a toothpick inserted into the center comes out clean. The cake should be slightly springy when pressed.
- Remove the cakes from the oven and cool in the pans for 10 minutes. Then, transfer them to wire racks to cool completely.
- Meanwhile, mash some strawberries gently in a bowl, leaving some chunks for texture. Set aside for filling and decoration.
- Beat the softened cream cheese and butter together until creamy and smooth, then gradually add the powdered sugar and continue beating until fluffy.
- Once the cakes are completely cooled, spread a generous layer of frosting on top of one layer. Scatter some fresh strawberries over the frosting for added flavor and color.
- Place the second cake layer on top and cover the entire cake with the remaining frosting. Decorate with whole strawberries and, if desired, a light dusting of cocoa powder.
- Chill the cake for at least 30 minutes before slicing to help the frosting set. Slice with a sharp knife, wiping clean between cuts for neat pieces. Serve and enjoy the vibrant, juicy flavor.
Notes
Pro tips for perfect cake
- Bolded Mini-Head: Use gel food dye for vibrant, intense color without thinning the batter. The cake will look fiery and striking.
- Bolded Mini-Head: Gently fold in strawberries to keep their juicy integrity and prevent the batter from becoming too watery.
- Bolded Mini-Head: When baking, tap the pans on the counter to release air bubbles for an even rise and a smooth top.
- Bolded Mini-Head: Check doneness by inserting a toothpick—if it comes out with moist crumbs, the cake is ready, not wet batter.
- Bolded Mini-Head: Chill the assembled cake for at least 30 minutes before slicing—this helps set the frosting and makes clean cuts easier.
- Bolded Mini-Head: For an extra moist crumb, brush the cooled layers lightly with strawberry syrup or a simple sugar syrup infused with a splash of lemon.
Common mistakes and how to fix them
- FORGOT to check oven temperature → Use an oven thermometer for accuracy.
- DUMPED batter before mixing fully → Mix until just combined to avoid toughness.
- OVER-TORCHED the edges → Cover edges with foil if browning too quickly.
- INCONSISTENT strawberry prep → Hull and quarter evenly for uniform texture and flavor.
Quick fixes and pantry swaps
- When batter is thick and difficult to pour, splash in a tablespoon of milk and gently fold.
- If frosting is too runny, chill it for 10 minutes or add a pinch more powdered sugar.
- DUMPED too much food dye? Use a clean toothpick to carefully add more gel for vibrancy.
- When strawberries are watery, sprinkle with a teaspoon of cornstarch to absorb excess moisture.
- Splash a little lemon juice over strawberries to brighten their flavor and add a fresh shimmer.
Prep, store, and reheat tips
- Prepare the cake layers up to two days in advance; wrap tightly in plastic wrap and store at room temperature or in the fridge. The flavors meld better overnight, and it stays moist and tender.
- Frosted cake can be refrigerated for up to 24 hours. Cover loosely with plastic wrap or keep in an airtight container to prevent it from drying out and absorbing fridge odors.
- Strawberries can be sliced and stored in an airtight container in the fridge for up to 24 hours. Their bright flavor softens slightly but remains juicy and fragrant.
- Reheat slices gently in the microwave for 10-15 seconds to bring back softness. The cake may lose some moisture, so a quick warm-up helps revive its tender crumb and fresh flavor.
- For best flavor, serve the cake at room temperature. Remove from fridge about 30 minutes before serving, allowing the strawberries and frosting to soften slightly and release their aroma.
Common questions about Red Velvet Strawberry Cake
1. Can I use frozen strawberries?
Use ripe, fragrant strawberries for the best flavor. Frozen strawberries work too; just thaw and drain excess water before mixing.
2. Can I substitute fresh strawberries with frozen?
Yes, but drain them well and consider adjusting the sugar slightly if they’re very tart or watery.
3. What type of food dye is best?
Gel food dye gives the most vibrant, true red color without thinning the batter. Natural options like beet juice are milder and less intense.
4. Can I make the frosting dairy-free?
Yes, you can swap in Greek yogurt for cream cheese for a lighter frosting, but it will be less tangy and creamy.
5. How do I know when the cake is done?
Bake the layers until a toothpick in the center comes out clean, about 25–30 minutes at 180°C (350°F).
6. How long can I keep the cake?
Store the unassembled cake in the fridge wrapped tightly for up to two days. Frosted cake keeps well for 24 hours in the fridge.
7. How do I keep the cake moist?
Brush the cooled cake layers with a little strawberry syrup or simple syrup infused with lemon to keep them moist.
8. My frosting is too runny or too thick—what do I do?
If frosting is too soft, chill it for 10 minutes. For overly thick frosting, gently warm it or add a splash of milk.
9. My cake is over-baked on the edges, what now?
When the cake edges turn too dark, loosely cover with foil and lower the oven temperature slightly or bake for a few extra minutes.
10. How can I get neat slices?
To achieve a smooth finish, use a warm spatula to gently spread frosting, and chill the cake for 30 minutes before slicing.
This cake isn’t just a pretty face—it’s a celebration of summer flavors that can brighten even the gloomiest winter day. The scent of fresh strawberries and cocoa baking fills the kitchen with a nostalgic warmth that’s hard to beat.
Sharing this with friends or family turns a simple moment into a memory. It’s a reminder that a little effort in the kitchen can bring a lot of joy, especially when it looks as vibrant and tastes as fresh as this.

I’m Mayank, the creator, cook, and writer behind this blog. FeastChase is not just a collection of recipes — it’s a journey through tastes, memories, and moments that bring people together at the table.