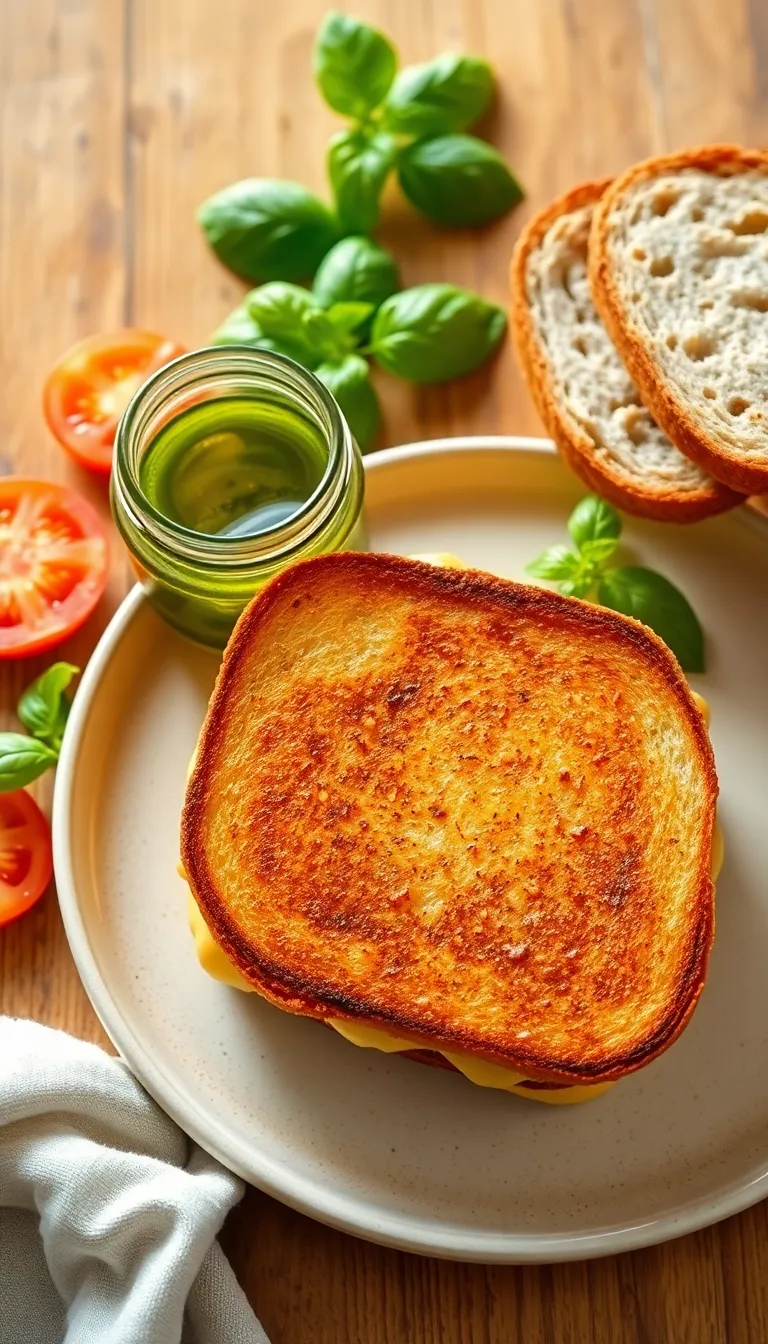
Get ready to elevate your grilled cheese game with a recipe that promises golden, crispy perfection and gooey, melty satisfaction with every bite. Whether you’re a beginner or a seasoned chef, this sandwich is all about capturing that nostalgic comfort while introducing a touch of gourmet flair. With its buttery crust and a blend of sharp cheddar and creamy mozzarella, each mouthful is a sensory delight that’s both familiar and exciting.
What sets this grilled cheese apart is the addition of a hint of garlic butter and a sprinkle of fresh herbs that infuse every bite with an irresistible aroma and flavor. As you hear the sizzle of the bread hitting the pan and watch the cheese start to melt, you’ll feel confident and inspired to create a masterpiece that’s as delicious as it is simple to make. Prepare to indulge in a classic that’s been lovingly enhanced to become your new favorite go-to comfort food.
About This grilled cheese sandwich Recipe

- Quick and Easy: This grilled cheese sandwich recipe is perfect for when you’re short on time but still want a satisfying meal.
- Perfectly Crispy: The secret technique in this recipe ensures a golden, crunchy exterior while keeping the cheese melted to perfection.
- Customizable Flavor: Easily adapt this recipe with your favorite cheeses or add extras like tomatoes and bacon for a personalized touch.
- Comfort Food Classic: This recipe delivers all the nostalgia of a classic grilled cheese with a modern twist that enhances flavor.
- Great for All Ages: Whether you’re making lunch for kids or a late-night snack for yourself, this sandwich is a guaranteed crowd-pleaser.
Why You’ll Love This Recipe

- Quick and Easy: This grilled cheese sandwich recipe takes just 10 minutes to prepare, making it perfect for a speedy meal any time of the day.
- Irresistibly Cheesy: With the perfect blend of gooey cheese varieties, each bite delivers a rich and satisfying flavor that will tantalize your taste buds.
- Customizable: Add your favorite ingredients like tomatoes, bacon, or avocado to make this classic sandwich truly your own.
- Crispy Perfection: Achieve a golden brown, crispy crust every time, thanks to our special cooking technique that enhances both texture and taste.
- Kid-Friendly Favorite: Loved by children and adults alike, this recipe is a surefire way to bring smiles to the table.
- Comfort Food Classic: Indulge in a timeless comfort food that offers warmth and nostalgia with every delicious bite.
Ingredients
- 2 slices of bread (white or whole wheat)
- 2 tablespoons of butter (softened for easy spreading)
- 2 slices of cheese (cheddar, American, or your favorite melting cheese)
- 1/4 teaspoon of garlic powder
(optional, for added flavor)
- 1/2 teaspoon of mayonnaise (optional, for a crispy exterior)
- 1 tablespoon of olive oil
(for cooking, can substitute with additional butter)
- 1/4 cup of tomato soup or ketchup (optional, for dipping)
- 1 slice of ham
(optional, for a heartier sandwich)
Kitchen Tools You’ll Need
- Non-stick skillet or griddle: Essential for evenly grilling the sandwich to a perfect golden brown. A cast iron skillet can also be used for a crispier texture.
- Spatula: Useful for flipping the sandwich without spilling the contents. A silicone or metal spatula works well for this task.
- Bread knife: Ideal for slicing the bread to your preferred thickness, ensuring even toasting. A serrated knife can serve as a good alternative.
- Butter knife: Used to spread butter evenly on the bread slices. In a pinch, a spoon can also be used for spreading.
- Cheese grater: Helps to grate cheese for an even melt. If pre-sliced cheese is used, this tool can be omitted.
- Cutting board: Provides a stable surface for assembling the sandwich and slicing the cheese and bread.
Preparation Steps
- Butter one side of each bread slice evenly, ensuring full coverage to avoid uneven toasting.
- Preheat a skillet over medium heat until it’s hot but not smoking, about 2-3 minutes.
- Place a slice of bread, buttered side down, onto the skillet. Add a layer of cheese on top, covering the bread evenly.
- Top with the second slice of bread, buttered side up, pressing gently to adhere the sandwich together.
- Cook for 3-4 minutes on one side, or until the bread turns golden brown and the cheese begins to melt. Tip: Lower the heat if the bread browns too quickly.
- Flip the sandwich carefully using a spatula, and cook for another 3-4 minutes until the other side is golden brown and the cheese is fully melted.
- Remove the sandwich from the skillet and let it rest for 1 minute before slicing to allow the cheese to set slightly.
Serving Suggestions

- Tomato Soup Pairing: Serve your grilled cheese sandwich with a warm bowl of tomato soup. The creamy and tangy flavors of the soup complement the crispy and cheesy sandwich, creating a classic and comforting meal.
- Pickle Garnish: Add a few slices of dill pickles on the side. The acidity and crunch of pickles provide a refreshing contrast to the richness of the cheese and butter.
- Side Salad: Pair with a light mixed greens salad drizzled with a balsamic vinaigrette. This adds a healthy touch and a variety of textures to your meal, making it perfect for a light lunch.
- Fruit Plate: Serve alongside fresh fruit such as apple slices or grapes. The natural sweetness and juiciness of the fruit balance the savory flavors of the grilled cheese.
- Craft Beer or Iced Tea: For beverages, a crisp craft beer or a refreshing glass of iced tea can enhance the dining experience, providing a delightful contrast to the hearty sandwich.
- Herb Garnish: Sprinkle some fresh herbs like parsley or chives over the top of the sandwich before serving. This not only enhances the presentation but also adds a burst of fresh flavor.
Final Thoughts: With these serving suggestions, a simple grilled cheese sandwich can be transformed into a versatile and satisfying meal suitable for various occasions. Whether you’re enjoying a cozy night in or hosting a casual lunch, these ideas can help elevate your dish to the next level.
Pro Tips for Perfect Results

- Choose the Right Bread: Opt for a thick-cut, hearty bread like sourdough or brioche. These breads provide structure and absorb the flavors without becoming too soggy.
- Butter the Bread, Not the Pan: For even browning and a crispy texture, spread softened butter directly on the bread slices instead of melting it in the pan. This ensures every bit of bread is coated evenly.
- Use a Cheese Blend: Mix different cheeses such as sharp cheddar, Gruyère, and mozzarella to create a complex flavor profile. The combination of cheeses also improves melting characteristics.
- Low and Slow Cooking: Cook the sandwich over medium-low heat. This allows the cheese to melt thoroughly and prevents the bread from burning before the cheese is gooey.
- Preheat the Cheese: If you want the ultimate melt, consider grating or thinly slicing your cheese and allowing it to come to room temperature before assembling the sandwich. This helps it melt more quickly and evenly.
- Make Ahead for Efficiency: Assemble the sandwiches in advance and store them in the refrigerator with wax paper in between. When ready to cook, take them out and let them sit for a few minutes at room temperature before grilling.
Common Mistakes to Avoid

- Using the Wrong Bread: Choosing a bread that’s too thick or too thin can impact the texture and flavor of your sandwich. Thick bread may not cook through evenly, while thin bread can become too crispy or fall apart. Opt for a medium-thick slice of sturdy bread like sourdough or whole wheat for the best results.
- Not Using Enough Butter: Skimping on butter can lead to a dry sandwich that lacks that classic crispy golden crust. To avoid this, generously butter the outside of each bread slice. Ensure the butter is softened for easy spreading, and cover the whole surface for even browning.
- Cooking on Too High Heat: High heat can cause the bread to burn before the cheese has a chance to melt. Use medium to low heat to allow the cheese to melt slowly while the bread turns perfectly golden brown. This patience will reward you with a perfectly balanced texture.
- Overstuffing with Cheese: While it’s tempting to add extra cheese, too much can lead to a soggy sandwich or cheese spilling out during cooking. Use a moderate amount of cheese, about 1-2 slices or 1/4 cup of shredded cheese per sandwich, to maintain structural integrity and ensure even melting.
- Skipping the Pressing Step: Not pressing the sandwich while cooking can result in uneven toasting and unmelted cheese. Use a spatula to gently press down on the sandwich as it cooks, which helps achieve even browning and ensures the cheese melts properly, giving you that satisfying gooey texture.
Storage and Reheating Tips
- Allow the grilled cheese sandwiches to cool to room temperature before storing to prevent moisture build-up.
- Place sandwiches in an airtight container or wrap tightly with plastic wrap or aluminum foil to maintain freshness.
- Refrigerate the sandwiches for up to 3 days. Do not leave them at room temperature for more than 2 hours to avoid bacterial growth.
- To freeze, wrap each sandwich individually in plastic wrap, then place them in a freezer-safe bag or container. They can be stored in the freezer for up to 1 month.
- For reheating refrigerated sandwiches, use a skillet over medium heat. Heat each side for 3-4 minutes until the bread is crispy and the cheese is melted. Avoid using a microwave, as it can make the bread soggy.
- If reheating from frozen, it’s best to thaw the sandwiches in the refrigerator overnight first. Then, follow the skillet reheating instructions.
- Alternatively, use an oven preheated to 350°F (175°C) for about 10 minutes to reheat either refrigerated or thawed sandwiches. This helps maintain the crispiness of the bread.
- Ensure the internal temperature reaches at least 165°F (74°C) when reheating to ensure food safety.
Proper storage and reheating of grilled cheese sandwiches can help preserve their delicious qualities while ensuring they are safe to eat. By following these guidelines, you can enjoy a tasty and satisfying meal even when it’s made in advance.
Frequently Asked Questions

Q: Can I use a different type of cheese for my grilled cheese sandwich?
- Yes, you can substitute with any cheese that melts well, like mozzarella, provolone, or gouda, to create different flavors.
Q: How do I prevent my sandwich from getting soggy?
- Ensure you use medium heat to allow the bread to crisp up without burning before the cheese melts completely.
Q: Can I make a grilled cheese sandwich without butter?
- Yes, you can use mayonnaise on the outside of the bread as an alternative to butter for a crispy texture.
Q: How can I add more flavor to my grilled cheese sandwich?
- Consider adding ingredients like tomato slices, bacon, or caramelized onions for extra flavor.
Q: What should I do if my cheese isn’t melting properly?
- Cover the pan with a lid for a minute to trap heat and help the cheese melt more evenly.
Q: Is it possible to make a vegan grilled cheese sandwich?
- Yes, use vegan cheese and a plant-based butter or oil to make a delicious vegan version.
Final Thoughts

This Grilled Cheese Sandwich Recipe stands out with its perfect balance of crunchy bread and gooey, melted cheese. The simplicity yet richness of flavors make it a comforting classic that’s hard to resist. Whether you’re a beginner or a seasoned cook, this recipe offers a delicious experience that’s both satisfying and rewarding.
Feel free to get creative and add your personal touch by experimenting with different types of bread, cheeses, and additional ingredients like tomatoes or bacon. Making it your own is part of the fun, and you never know—you might stumble upon a new favorite combination!
We warmly invite you to try this recipe and enjoy the delightful experience of creating and savoring a homemade grilled cheese sandwich. It’s a wonderful opportunity to share a meal with loved ones or enjoy a moment of culinary bliss just for yourself. Happy cooking!